Showing posts with label tutorial. Show all posts

Saturday, June 8, 2013

How to get Rock Lee eyebrows.

Hello, Everyone!

Continuing from yesterday's post, I'll be filling in my eyebrows this time. I prefer a clean but natural look, unfortunately, my eyebrows aren't very full. I'll be using a pencil that is a bit too light for me so that you can see what I'm doing a bit easier. (I also made it a little bit thick, but you'll forgive me, right?)

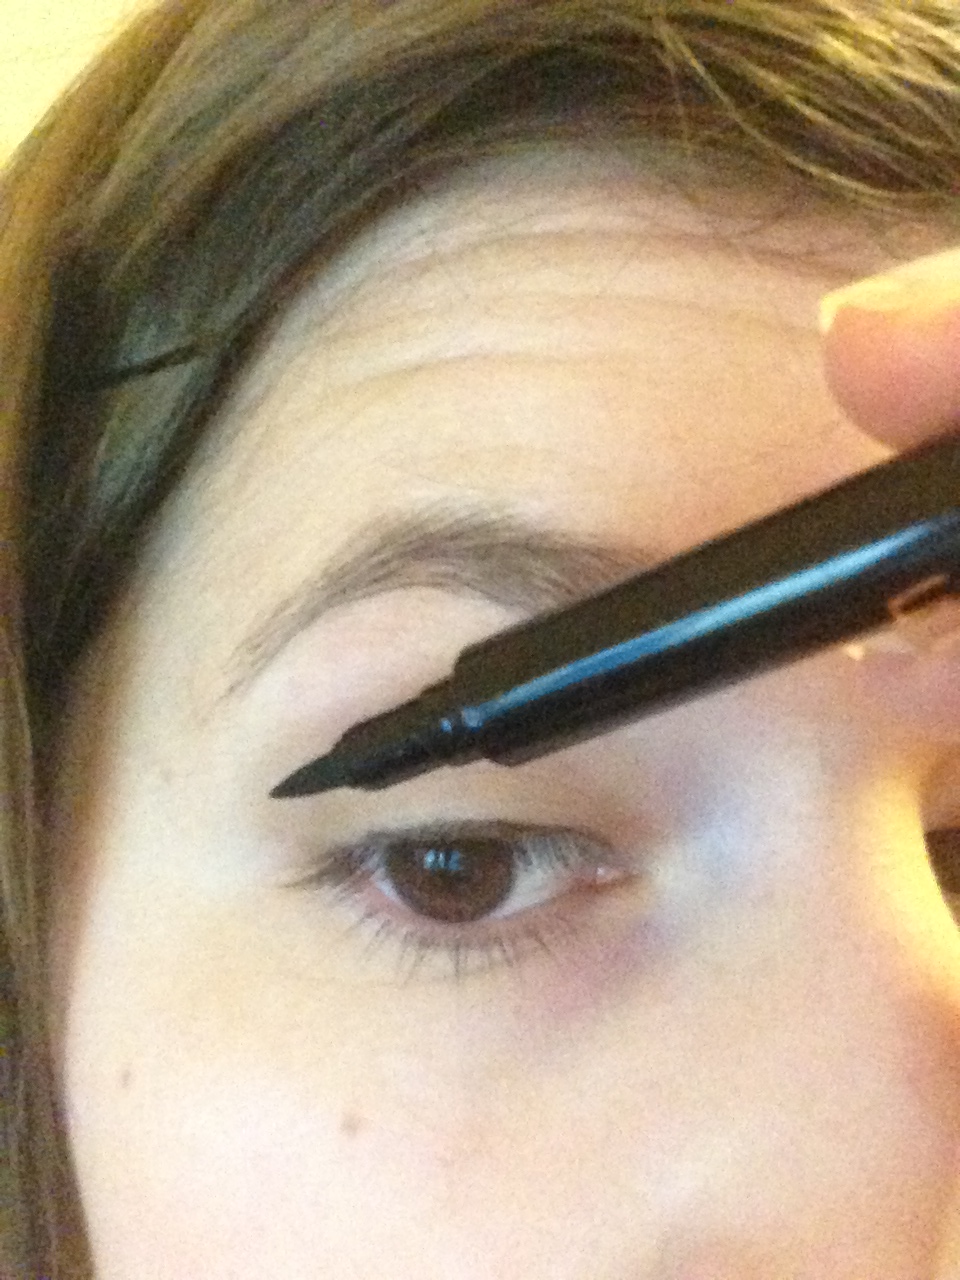
Starting from the inner corner, take your brow pencil and make tiny strokes (it'll imitate the natural look of hairs) and draw it out to your arch.

Then continue down towards the end of your brow. Defining just the top of your brow will keep it looking natural but still get the clean line.

 Taking an angled brush and a dark eyeshadow or brow powder in a shade that matches your hair color, start in the center of your brows and work your way towards the inner part. Doing it this way will concentrate the pigment on the center and your brows won't get too dark in the inner corner, preventing that boxy look.

Take a clear mascara or brow gel and gently brush through your brows like you would with a spoolie. (a spoolie is a brush used for grooming the eyebrows)

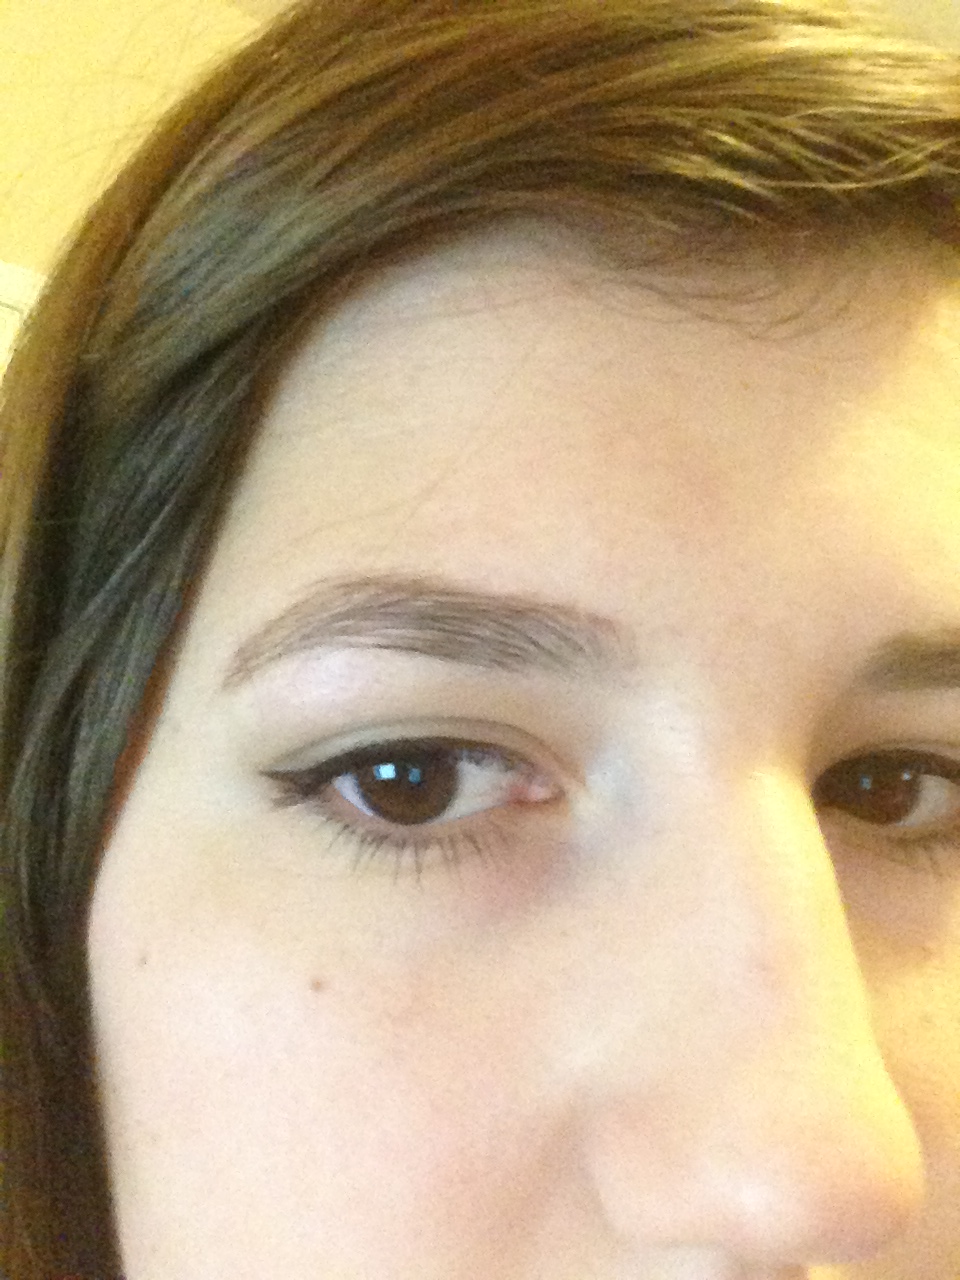
And here is the finished result! This is great for those who like the natural look, and it can even thicken your brows.


Thanks for reading, hope it was useful!
~Kylie~

Products used:
Estee Lauder eyeliner in 03 Copper Writer (for demonstration purposes)
Urban Decay Brow Box in Beige Betty
Maybelline Great Lash Clear Mascara
Estee Lauder Angled Brush

Friday, June 7, 2013

Tutorial: Winged Eyeliner

Hi, everyone!

Today I'm going to be writing a more detailed winged eyeliner tutorial, using a felt tip eyeliner. So I already have my face makeup and eyeshadow out of the way.
To get your eyeliner as close to the lash line as possible, while keeping it steady, you'll want to hold your eyeliner sideways...

And press it down against your lashes, then push it back against eyelid, then make a small stroke.

Here's an example of what it should look like. Keep repeating that towards the inner corner.

Once you make it to the outer corner, you'll want to flip it around so that you're working from the other direction. Remember to press it down against your lashes.
And the foundation for our wing is complete.

To find out a flattering angle for your wing, you'll want to line up your bottom lash line with the end of your eyebrow.

Keep working your eyeliner in this direction to keep the wing sharp.

Draw a line like this...

And carefully connect it  by filling in the gap, try not to touch the tip of the wing to keep it sharp.

If you have hooded eyelids, make sure that the wing comes down low enough that it doesn't go over your crease or it'll look wonky.

Curl eyelashes, add mascara, and a simple winged eyeliner look is done! :)

Thanks for reading!
~Kylie~

Products used:
Naked Basics Palette
Jordana Fabuliner in Black.